How to Install a Whiteline Heavy Duty Adjustable Rear Sway Bar on your 2005 to 2013 Mustang

Shop Parts in this Guide
(Always refer to the current catalogue for complete application listings)
N.B: This installation guide should be used in conjunction with the workshop manual

1. Raise the vehicle on hoist, or alternatively raise the rear of the vehicle and place on safety stands.
2. Remove the rear sway bar and brackets. Discard. 3. Remove the original fitted sway bar links. Discard.
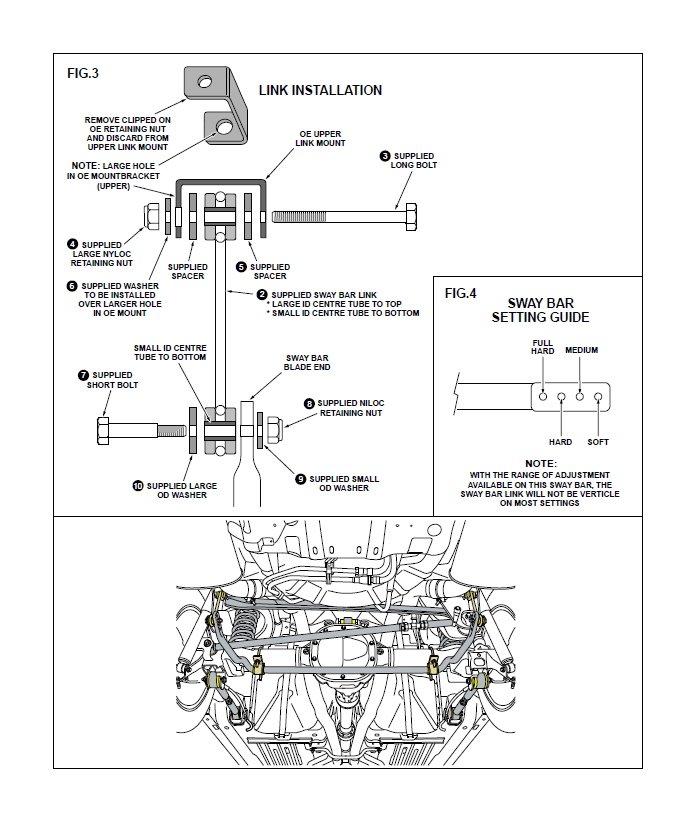
4. Remove the clipped on retaining nut from the upper link mount point. Discard. (Fig 3).
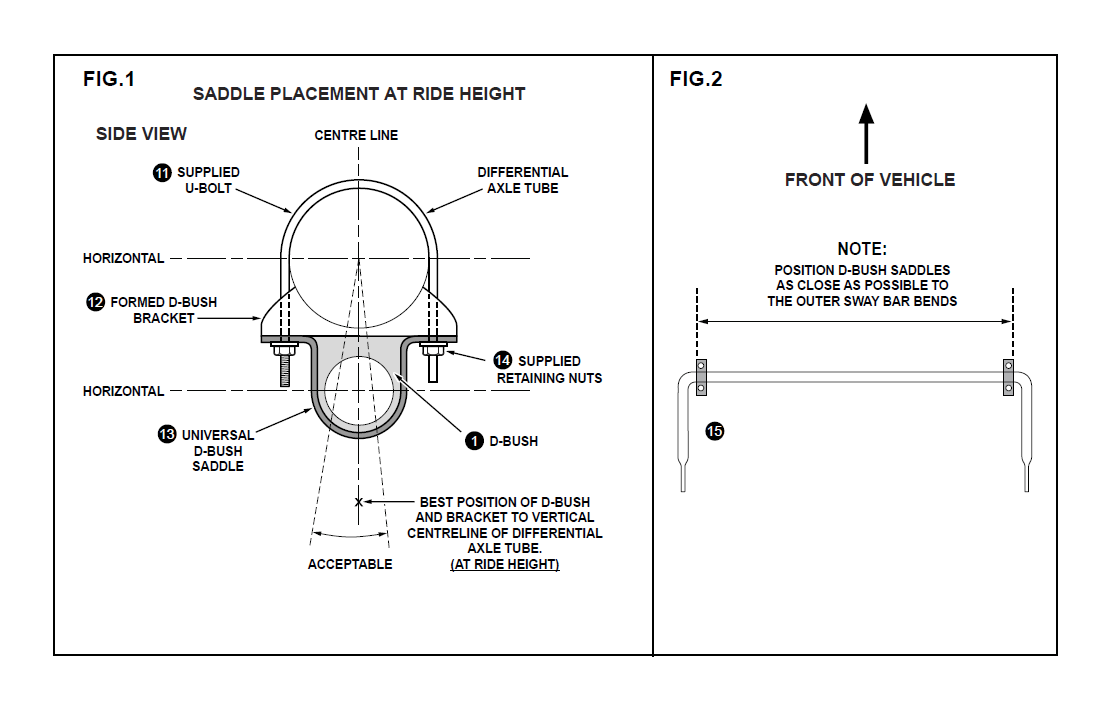
5. As per figure 1, fit the supplied mounting hardware in position after greasing contact surfaces including the bore of D-bush and sway bar with the grease supplied.
NOTE: Do not tension sway bar to axle tube hardware at this stage.
6. As per figure 2, locate the saddles away from the centre of the differential towards the sway bar outer bends keeping the bar centralised.
NOTE: Do not tension sway bar to axle tube hardware at this stage.
7. As per figure 3, fit the link kit hardware into position after greasing contact surfaces with the grease supplied.
NOTE: We recommend fitting the link to the soft setting at initial fit up until you are accustomed with the new vehicle behaviour. (refer to Fig.4).
8. With the vehicle at ride height and the link kit upper and lower points fitted and tensioned, position the sway bar D-bush saddle kit into the correct position on the axle tube as per figure 1 and figure 2. Tension the U-bolt retaining nuts equally.
9. Check tension of all fitted hardware and road test.
10. Re-check all components after 60 miles but no more than 100 miles.


N.B: It is recommended that a licenced workshop or trades person carry out the above procedure and that workshop manual and relevant safety procedures are followed in addition to the above.

