How to Install Whiteline Rear Subframe to Body Bushing Insert Kit (15-17 All) on your Ford Mustang
Tools Required
- 13mm Socket
- 21mm Socket
- Lever/pry Bar
- Torque wrench
- Jack / Lift
- Jack Stands
Shop Parts in this Guide
N.B: This installation guide should be used in conjunction with the workshop manual.
Bill Of Materials:
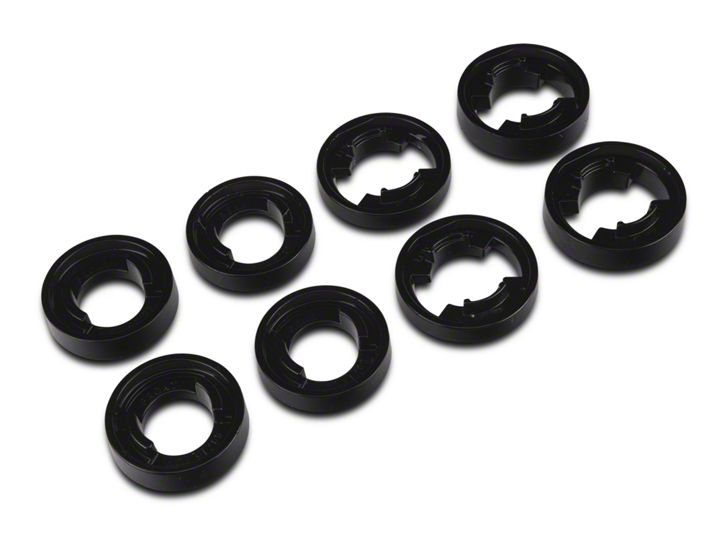
2 x 68713 Rear lower synthetic elastomer inserts.
2 x 68714 Rear upper synthetic elastomer inserts.
2 x 68715 Front upper synthetic elastomer inserts.
2 x 68718 Front lower synthetic elastomer inserts.
1 x Grease satchet.
1 x Install guide.
Removal procedure:
1. Raise the rear of the vehicle and support on suitable chassis stands.
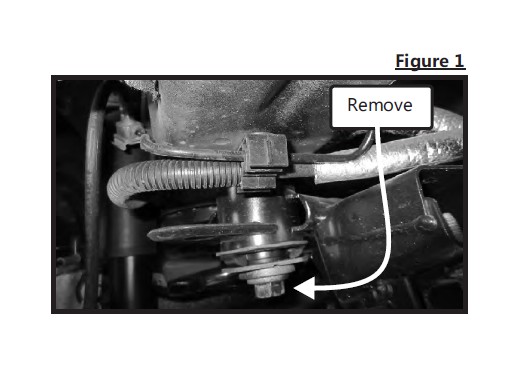
2. Support the rear of the subframe with the jack and using the 21mm socket remove both the rear 21mm hex head bolts. These are painted blue in colour. (Figure 1.)
Note: Before removing the lower washer take note of the installed orientation.
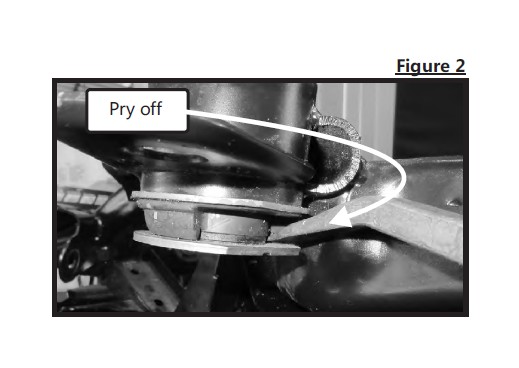
3. Using a pry bar, lever off the two lower captive OEM washers out of the subframe bushing tubes. (Figure 2.)
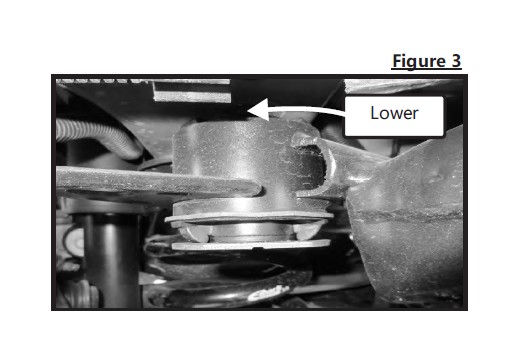
4. Lower the jack down just enough to lower the subframe to gain access to the top of the rear bushing. (Figure 3.)
5. Using the supplied grease lubricate all the faces that are in contact with the rubber bushing or steel washer.
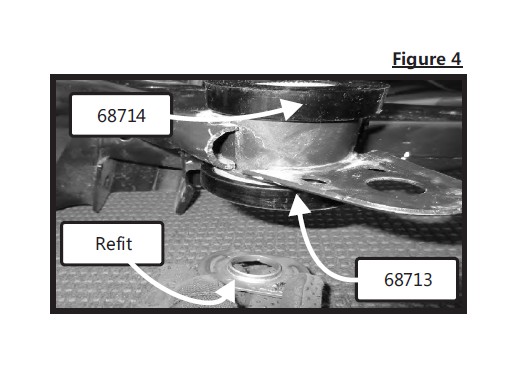
6. Install the 68714 inserts to the top of the bushing and the 68713 inserts to the bottom of the bushing. (Figure 4.) Note: Both inserts are marked inside with their respective part numbers and locations.
7. Jack the subframe back up into place and refit the 21mm hex head bolts.
8. Using the torque wrench tighten the bolts to 130 ft/lbs or 176 N/m
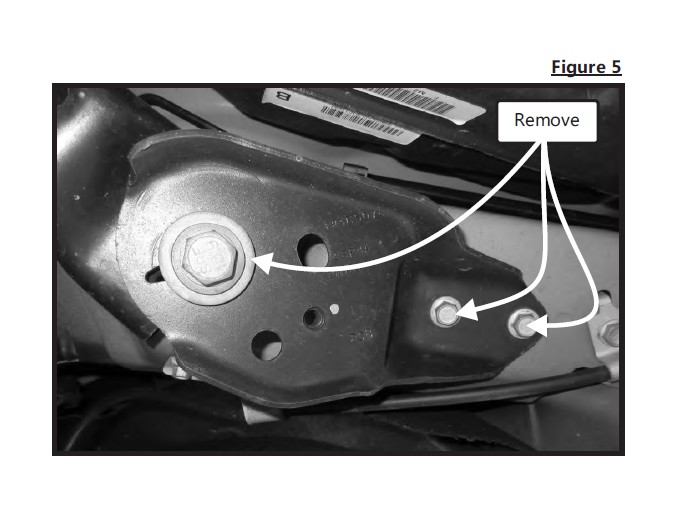
9. Place the jack under the front of the subframe and loosen the 4 x 13mm hex head bolts on the front subframe retaining plates. (Figure 5.)
10. Remove the 2 x 21 mm hex head bolts, blue in colour and lower the jack slightly to gain access to the top of the OEM rubber bushings. (Figure 5.)
11. Using the supplied grease lubricate all the faces that are in contact with the rubber bushing.
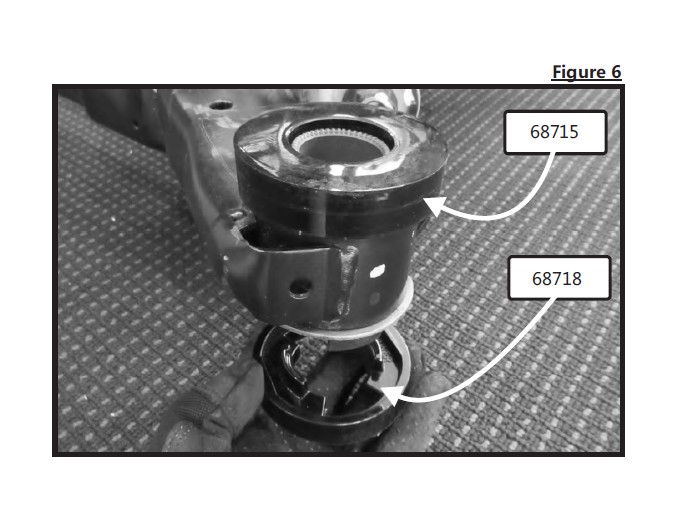
12. Install the supplied 68715 and 68718 inserts into the rubber OEM bushing.
13. Jack the frame back up into place and refit the retaining plate 21mm hex head bolts and the 13mm hex head bolts.
14. Using the torque wrench, torque the 21mm hex head bolts to 130ft/lbs or 176 N/m and the 13mm hex head bolts to 35 ft/lbs or 47 N/m.
15. Remove the stands and lower the vehicle onto the ground. 16. Re-torque all the bolts after 60 Miles or 100 Kms.
