
Ford Motorcraft Mustang OEM Fuel Filter ('05-'10) - Installation Instructions
Installation Time
60 minutes
Tools Required
- Ramps or a jack and jack stands (or a lift)
- Ratchet wrench with 10mm deep socket
- Flat head screwdriver
- Eye Protection
- Rags and pan to catch or clean up fuel
- Replacement Fuel Filter
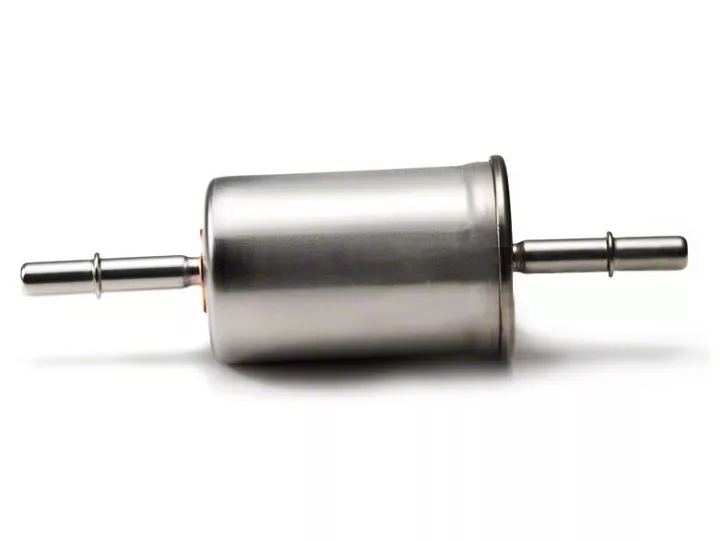
Shop Parts in this Guide
Installation
1. Your 2005-2009 Mustang fuel filter is located underneath the left side of the vehicle, directly beneath the driver's entrance.
2. First begin by elevating the front of the vehicle, either with ramps or with jack supported by jack stands. Although it is probably not an option for many owners, if you have access to a lift, you may lift the entire vehicle for the easier access.
3. Once you lift the vehicle you will see a long, plastic cover which conceals the fuel filter, fuel lines and some other lines. You will know the location of the fuel filter since it has a bolt that can be seen through the center of the cover that retains the filter, which can be seen without removing the cover.
4. You will need to remove the bolt in the center of the cover by the fuel filter with a ratchet and a 10mm deep socket. You will also need to remove 2 of the cover's retaining nuts, one in the front and one in the back with a 10mm socket and ratchet. There is also a bolt that can be removed with a 10mm socket located in the center cover by the fuel filter location.
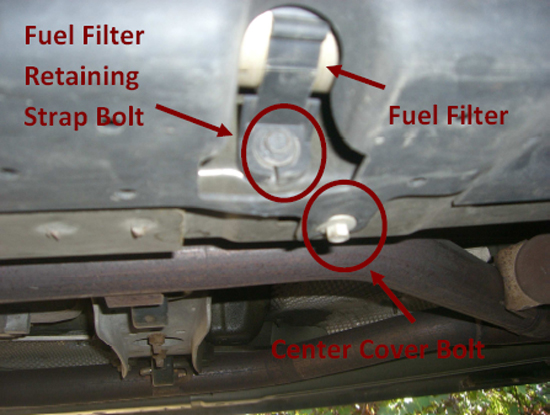
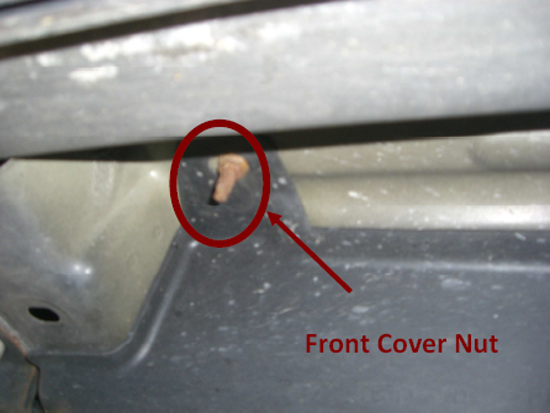
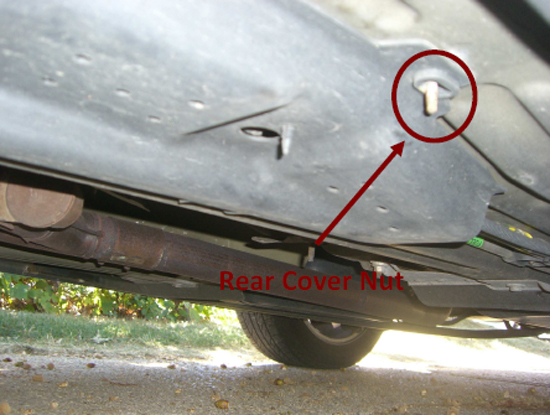
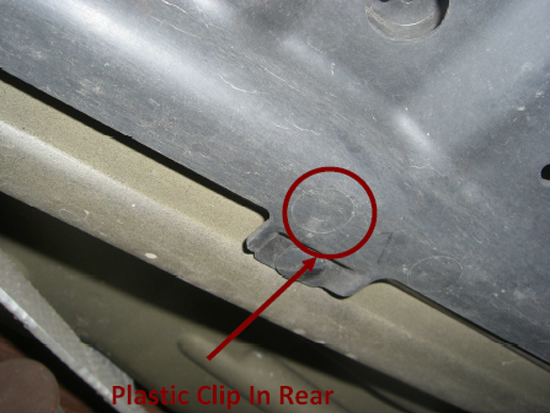
5. There is also a retaining plastic clip on the rear of the cover that can be popped out with a flathead screwdriver.
6. Once you have removed all retaining nuts and bolts drop the cover down. You do not need to remove the cover but just remove the hardware to gain access to the filter as shown.
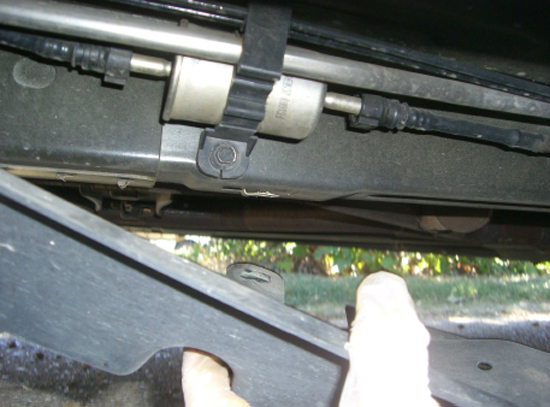
7. Remove the fuel strap retaining bolt to give you more room to maneuver during the installation.
8. On each side of the fuel filter are green buttons. Push the buttons and wiggle the lines off. Some fuel will begin to come out, but it is minimal and will eventually stop. Use pan and rags to catch and clean up any fuel.
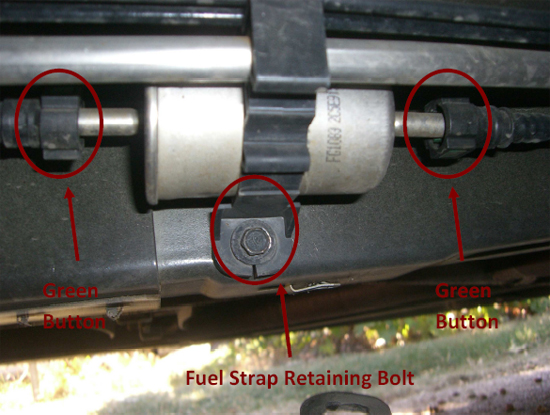
9. Slide the old fuel filter out through the front of the retaining strap. You may have to wiggle it a little to get it out.
10. Install the new fuel filter into the retainer strap.
11. Push the fuel lines onto the fuel filter inlet and outlet. You should hear them click in place.
12. Reinstall the fuel filter strap to the vehicle's chassis and reinstall cover in reverse order of removal.
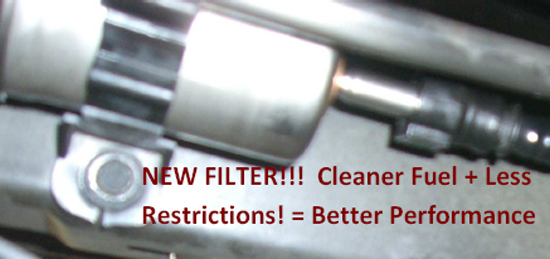
13. Turn your ignition key 2 times without starting the vehicle to build up pressure. Then start the car.
14. Check for leaks.
Installation instructions provided by AmericanMuscle customer Arthur Kappel 9.14.10
Related Guides
-
Installation
-
Installation
-
Installation

