2024-2025
 2015-2023
 2010-2014
 2005-2009
 1999-2004
 1994-1998
 1979-1993


Installation Time
(approx) 2 Hours
Difficulty Level:
Light to Moderate mechanical skill required.
 FREE 1 to 3-Day Delivery on Orders $119+ Details
Add Details


Change Vehicle Color In Photo
Select Your Color
 500+ Reviews
18 Answers
500+ Reviews
18 Answers
$119.99 pair
Will this fit your Vehicle?
Saved - View your saved items
We're sorry. We couldn't save this product at this time.
or use
Add Local Installation
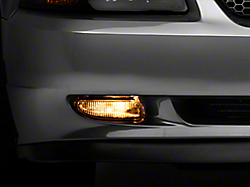
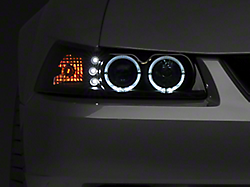
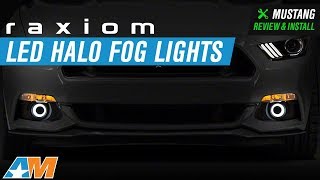
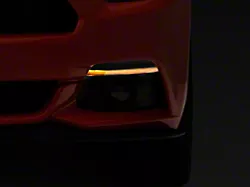
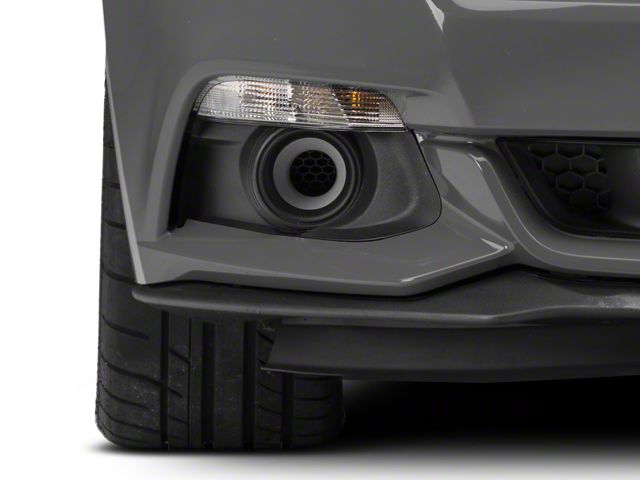
Hey guys, Adam here with americanmuscle.com. Today I'm gonna give you a quick review and install of the Raxiom LED halo fog light replacements fitting all 2015 to 2017 Mustangs with factory fog lights. Now, this is a great option for the S550 owner out there looking to get a really modernized upgrade for their front end, getting rid of the factory or traditional style fog lights for a nice LED upgrade in the form of a halo light. As you can see these are significantly brighter than your factory options and you can pick them up for just about 200 bucks for the pair, in my opinion, a hugely worthwhile upgrade. I really like the way these things look. They're definitely a big front end appearance upgrade and they go really well with your fish style lenses up in the headlights. Now aside from that, there is also a functionality aspect to it as well. The center is hollowed out which is a little bit different than most of the fog lights on the market. The backing there has a honeycomb backing with an ABS plastic finish which is actually gonna create somewhat of an air duct. The air flowing through will go straight through your fog lights to cool off your brakes, make its way to the engine bay, just adding that functionality aspect to an otherwise stylistically centered part. Now again 200 bucks for the pair. The install's a plug and play install, no cutting or splicing. I'm giving it one out of three wrenches on our difficulty meter. So let's see how it gets done. The tools needed for this install are a power tool or a ratchet, seven-millimeter socket, eight-millimeter socket, a panel removal tool or a flathead screwdriver, zip ties included in the kit. So to kick off the install here on our S550 we are going to need to remove the front bumper but before we can do that, we have to take off the top radiator shroud. There's eight pushpin clips we're gonna have to remove to pop that thing off. I'm gonna use a panel removal tool, you can use a flathead screw screwdriver, this just makes life just a little bit easier. So grab your panel removal tool or your flathead and pull those clips off. Now that we have the eight pushpin clips removed, we can pull our radiator shroud off. So with the radiator shroud out of place, we can start removing the bolts holding on our front bumper. Right underneath that shroud at the edge lip of the bumper, you'll find six eight-millimeter bolts you'll have to remove and two five and a half millimeter bolts. Those five and a half millimeter bolts are underneath a weather strip which I'll show you in just a second, but first off let's tackle the eight-millimeter bolts. After the six eight-millimeter bolts are removed underneath the weatherstripping on each side there will be one additional five and a half millimeter bolt. Remove those, we've already got ours taken out, but once you get that out, you'll be good to go. At this point, you need to get the front end of your S550 up in the air to remove the splash shield underneath the front end. Now there's a couple different versions of the splash shield, all of which are held on either bolts or pushpin clips that you can use a panel removal tool or the appropriate size socket. We've already got ours off so once you get yours out of place you can move on to the front wheel wells. In the front wheel wells, there's a couple of pushpin clips holding on the fender liner to the front bumper which we'll pull off again with our panel removal tool or the flathead screwdriver. And once both sides are taken care of there's one more seven-millimeter bolt holding on that front bumper in the wheel wells. We'll take care of that and pull off our front bumper. Now getting into the wheel wells can be a little bit tight with the tires and obviously not a lot of fender gap, so it is a little bit easier to turn the wheel to the opposite side of the fender you're working on. Once you have the bolts and the wheel wells taken out, you can peel back the bumper, reach your hand in there to the fog lights and disconnect all the wiring harnesses. With all of your bolts disconnected holding on your front bumper, it's time to get on the front side and just pull it off very gently. Now you wanna make sure you're not pulling anything off that already has bolts connected to it. Make sure you disconnect all wiring harnesses so you don't pull that away from the vehicle as well. Once everything is disconnected from the front bumper pull it away from the vehicle. Now with the bumper out of place and off the vehicle, you wanna make sure you have somewhere safe to set it down. We're using a piece of foam core so it's not rubbing against the concrete just to make sure you don't scratch up your front paint. Now when it comes to actually removing your factory fog lights there's only going to be three seven-millimeter bolts holding the bracket of the factory fog lights in place. Pull those three bolts out, the whole fog light comes out and we can replace it with our Raxiom LEDs. Once one of the sides have been removed, just move onto the other side, do the exact same thing. Now that we've got our factory fog lights on the table here next to our Raxiom LED Halos, you can see a clear difference in craftsmanship, the housing, and the lighting itself. Now the factory fog lights are more of a traditional bulb. Now we do have a tint lens or tint film over top of our clear housing here. But just to give you an idea there is a huge, huge difference and upgrade over the factory stuff when it comes to the Raxiom replacements. This one's got a nice halo ring around it and the big thing I wanna point out here is the plug and play installation. A lot of fog light replacements out there that do offer an LED upgrade or a halo upgrade too you have to do a little bit of splicing, not the case here. We've got the resistor and the plug and play harness already attached to the fog light itself, making our install a lot easier. So you can see the huge upgrade here and I can't wait to see what the lighting looks like once we get it back on, so let's get back to the install. We're gonna get our fog light back into place here, the Raxiom replacement. We're gonna use the factory hardware to get this attached. All right. Do the same thing for the opposite side. With our factory fog lights bolted into place on our front bumper, we can rest the front bumper directly in front of the front end of our S550, reconnect all of our harnesses, plug in our plug and play Raxiom harness and then we can put our bumper back into place. From here we can pick up our Raxiom plug and play harness and the factory vehicle harness and connect them here. Now that is a plug and play fashion so it goes right into place. Now it's recommended because it can loosely come apart, you'll wanna take the zip ties that are included in the kit and zip-tie these together to make sure you have that added security. All right. At this point, you can actually 3M tape the excess resistor harness back so that it's not dangling down. That is included in the kit here and preassembled for you on the back of the Raxiom harness. [00:06:39] [music] [00:06:56] With all of our wires reconnected all we have to do now is mount our front bumper back into place, bolt it down on the top here under the hood, back into the wheel wells reconnecting our fender liner, then we'll finish it off with a radiator shroud and test out our lights. [00:07:08] [music] [00:07:37] All right. And with our radiator shroud back on we are good to go. So basically if you're looking for a nice modernized styling to your front end, an upgrade over the factory boring traditional fog lights, the Raxiom LED halo fog lights are a great option for your '15 to '17 Mustang. You can pick yours up right here at americanmuscle.com.
View Full TranscriptNow Playing

2015-2017 Mustang Raxiom LED Halo Fog Lights Review & Install
8:12
Subscribe: New Mustang videos daily!
Subscribe to our YouTube Channel
Features, Description, Reviews, Q&A, Specs & Installation

Raxiom 398032
CA Residents:  WARNING: Cancer and Reproductive Harm - www.P65Warnings.ca.gov
Installation Info
Installation Time
(approx) 2 Hours
Difficulty Level:
Light to Moderate mechanical skill required.
What's in the Box