
How to Install GMS Intake Plenum Spacer on a 2011-2014 Mustang V6
Installation Time
1 hours
Tools Required
- Torque wrench (Ib-in.)
- 13MM wrench/socket
- 8MM wrench/socket
- Socket Extensions
- Flathead Screwdriver
- Pliers
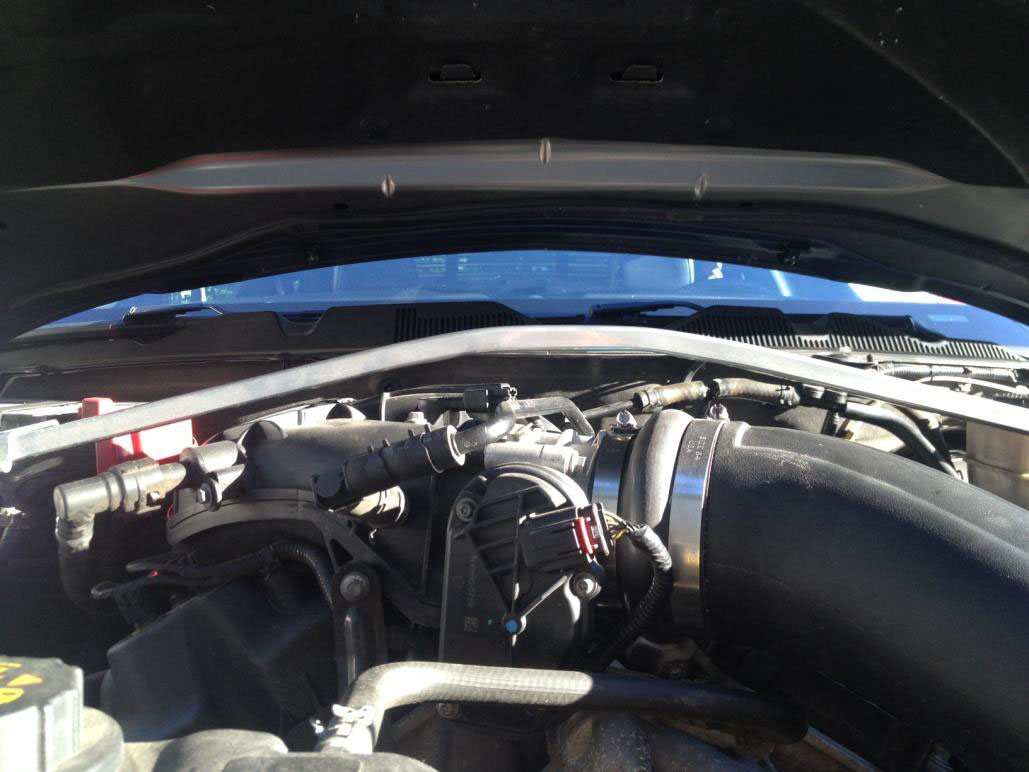
Installation Instructions:
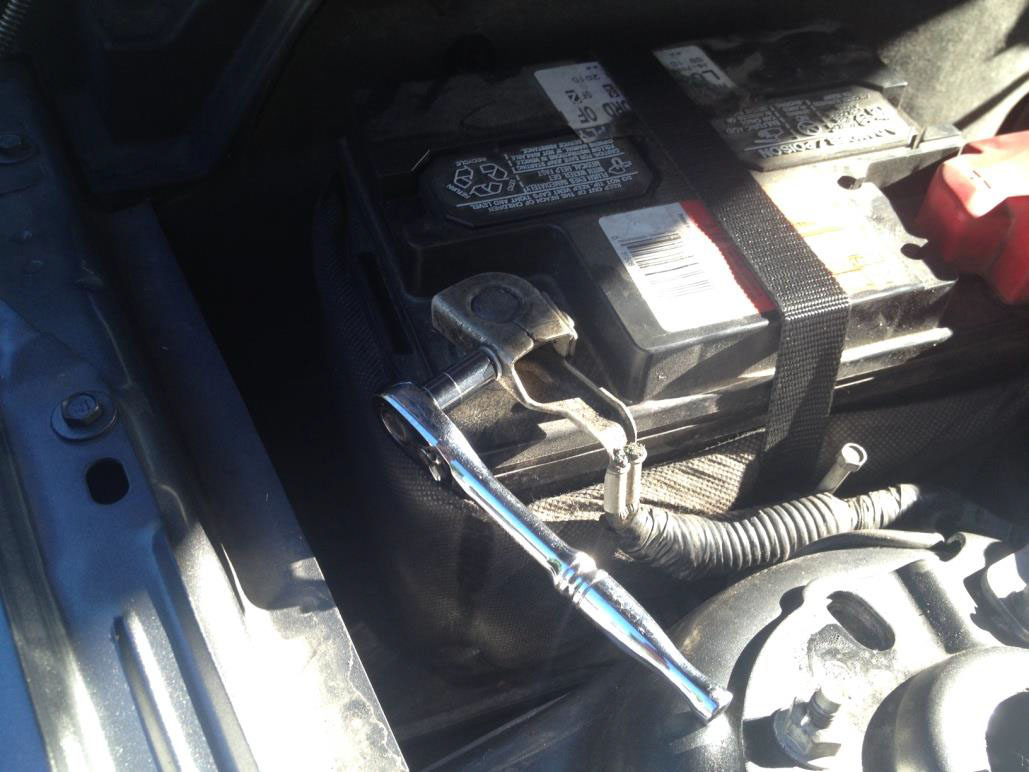
1. Disconnect the Negative (-) battery terminal using an 8mm socket
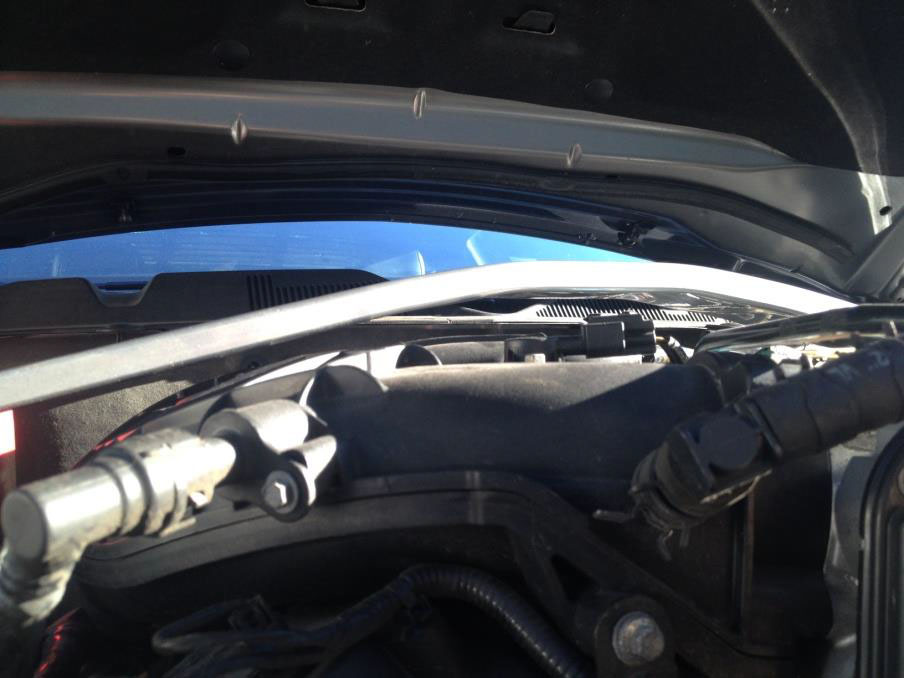
2. (If Equipped) Start by removing the (4) nuts holding down the Strut Tower Brace with 13mm socket. Set the brace aside
3. (If Equipped) Remove Engine Cover and set aside
4. Remove the Air Intake Tube by removing the PCV Quick disconnect and vacuum hose
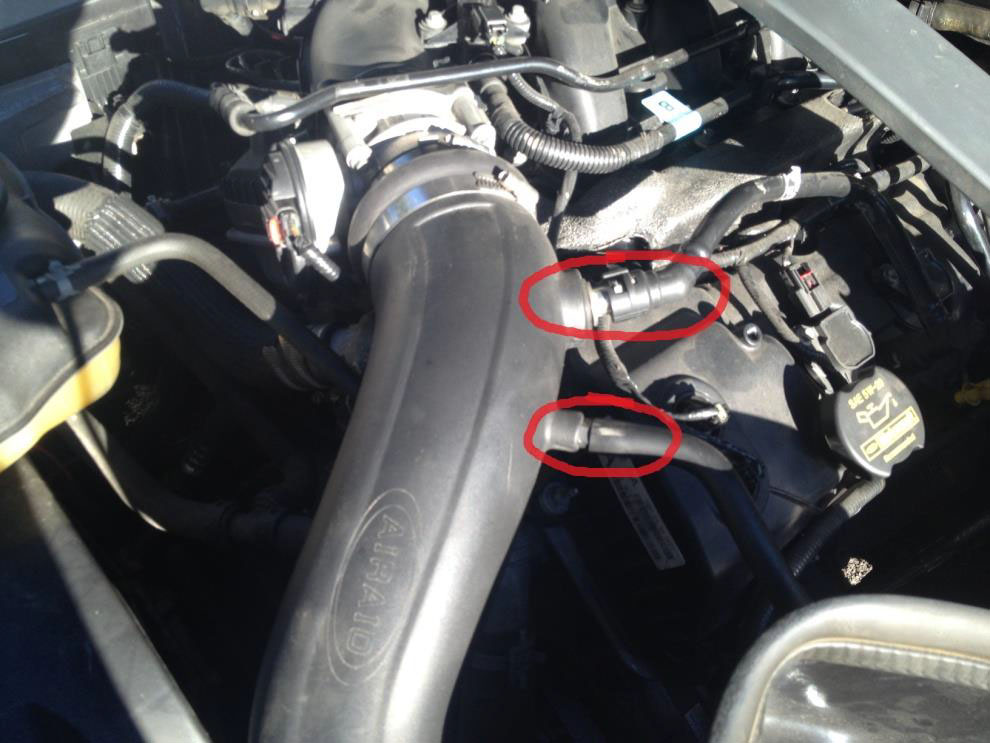
5. Remove the clamps with an 8mm socket or Flathead screw drive. Remove the Intake tube and set aside
6. Disconnect the Throttle Body connection by pulling the red tab out and then pushing in on the black tab while pulling the connector back
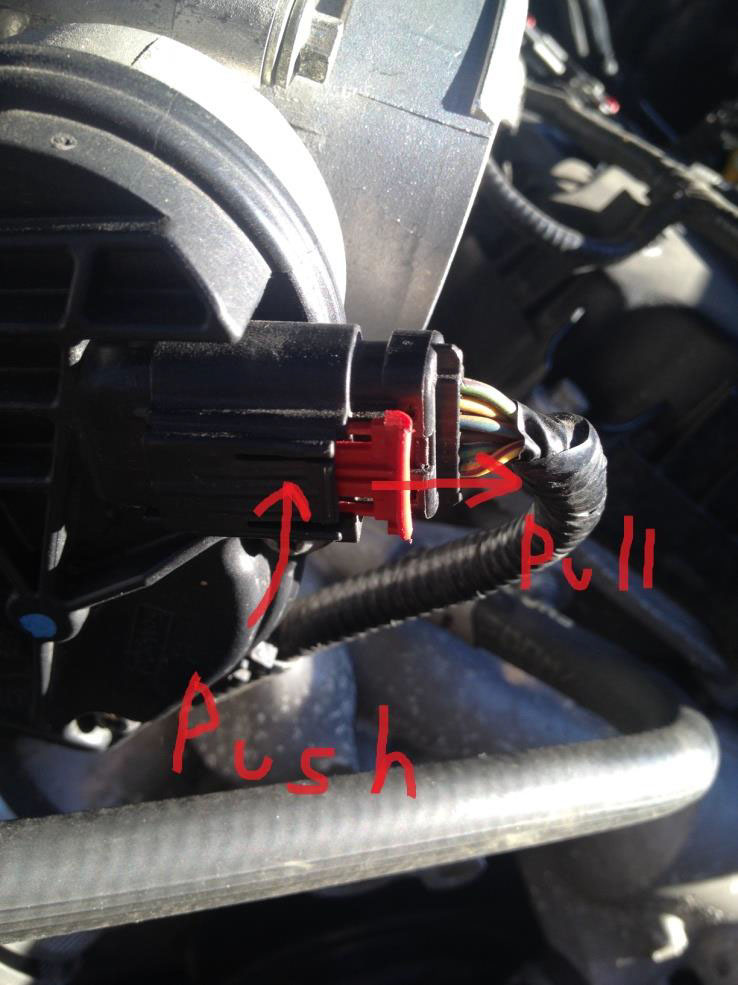
7. Then remove the plastic pin harness holder from its location
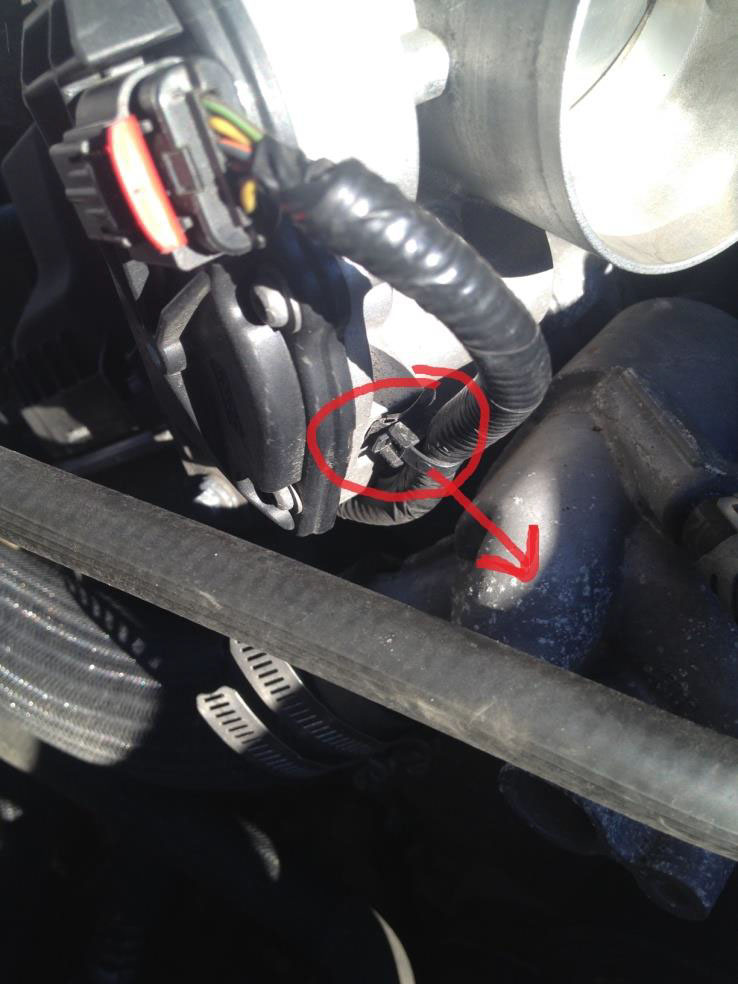
8. Remove the Passenger side PVC tube quick disconnect
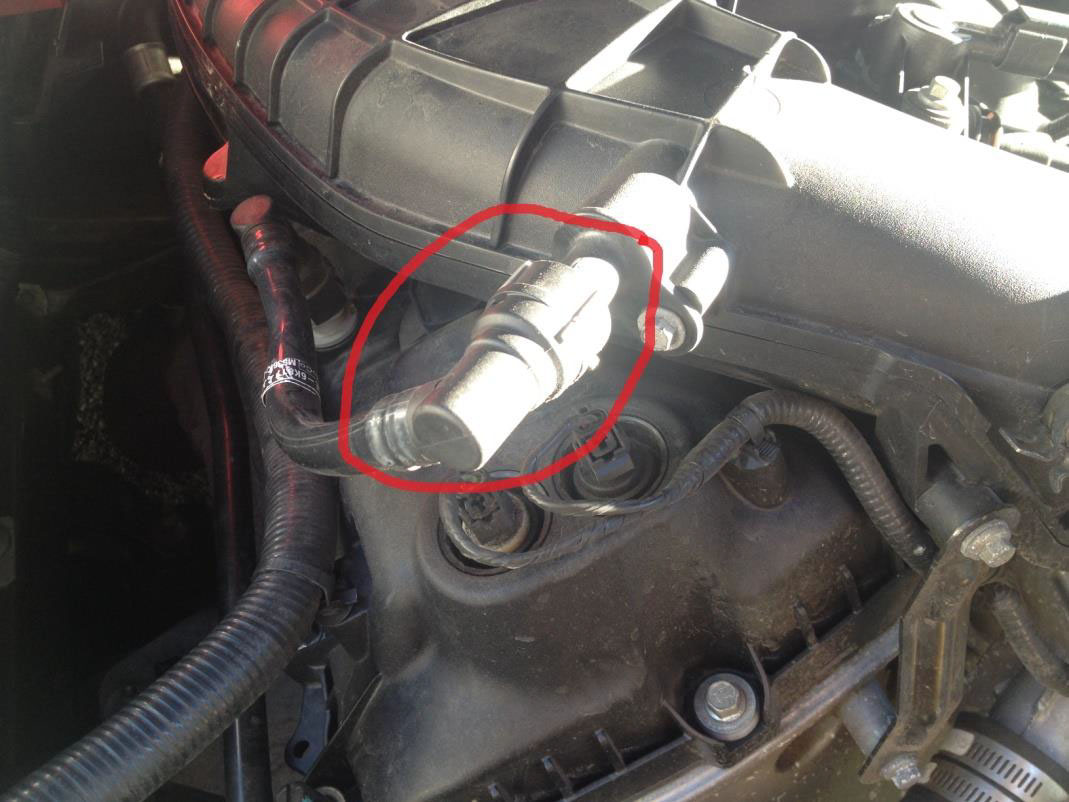
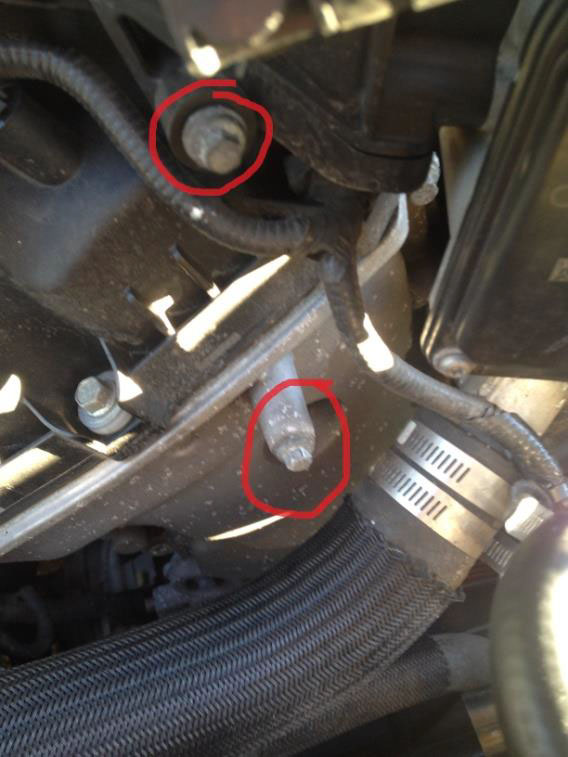
9. Remove the Intake support bracket by removing the (2) 8mm bolts. Set aside
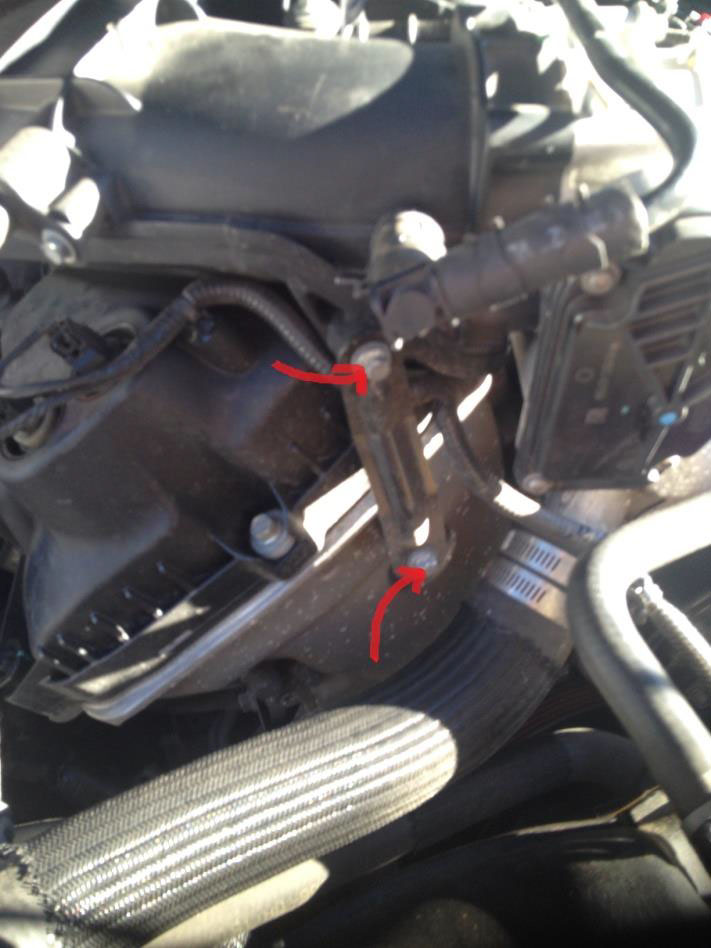
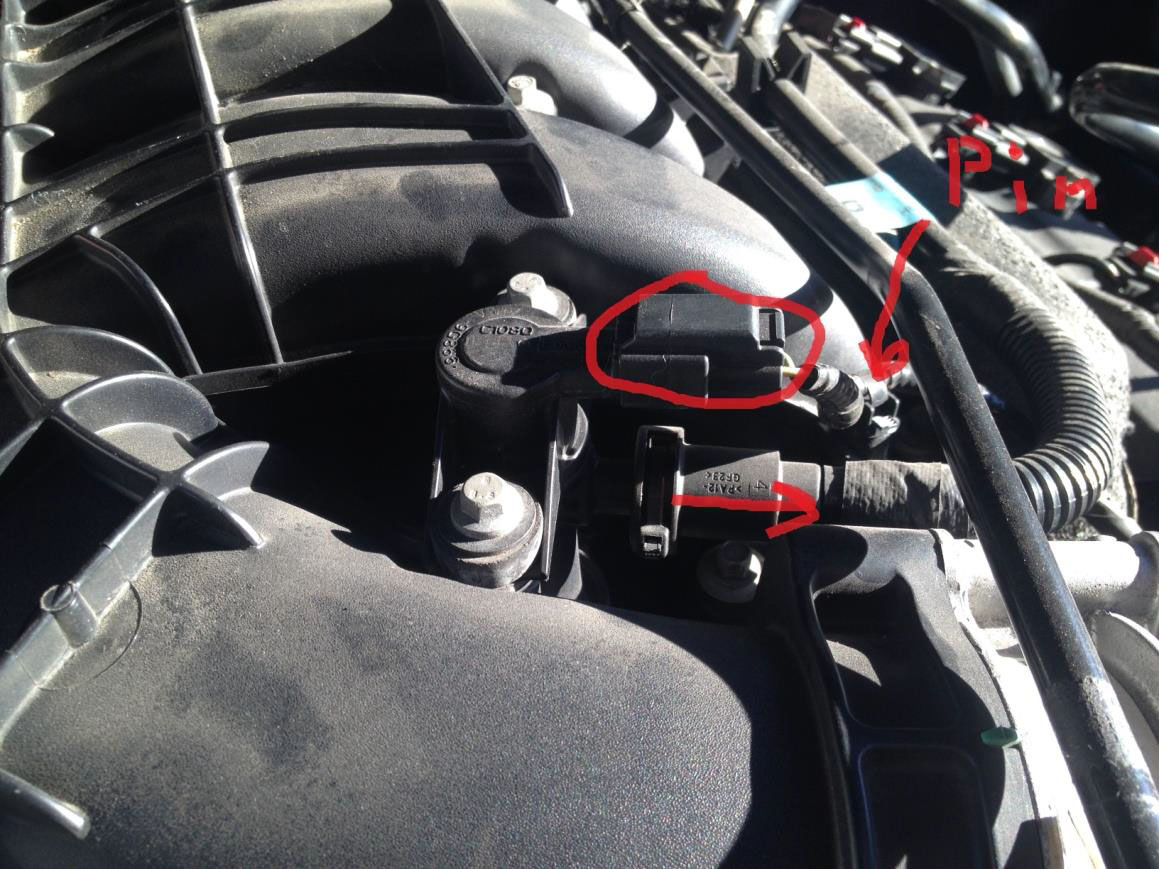
10. A Pinch the Brake Booster Hose Clamp off with Pliers (Circled in red) and disconnect the lines. Then remove EGR Hose from its Holder (Red Arrow)
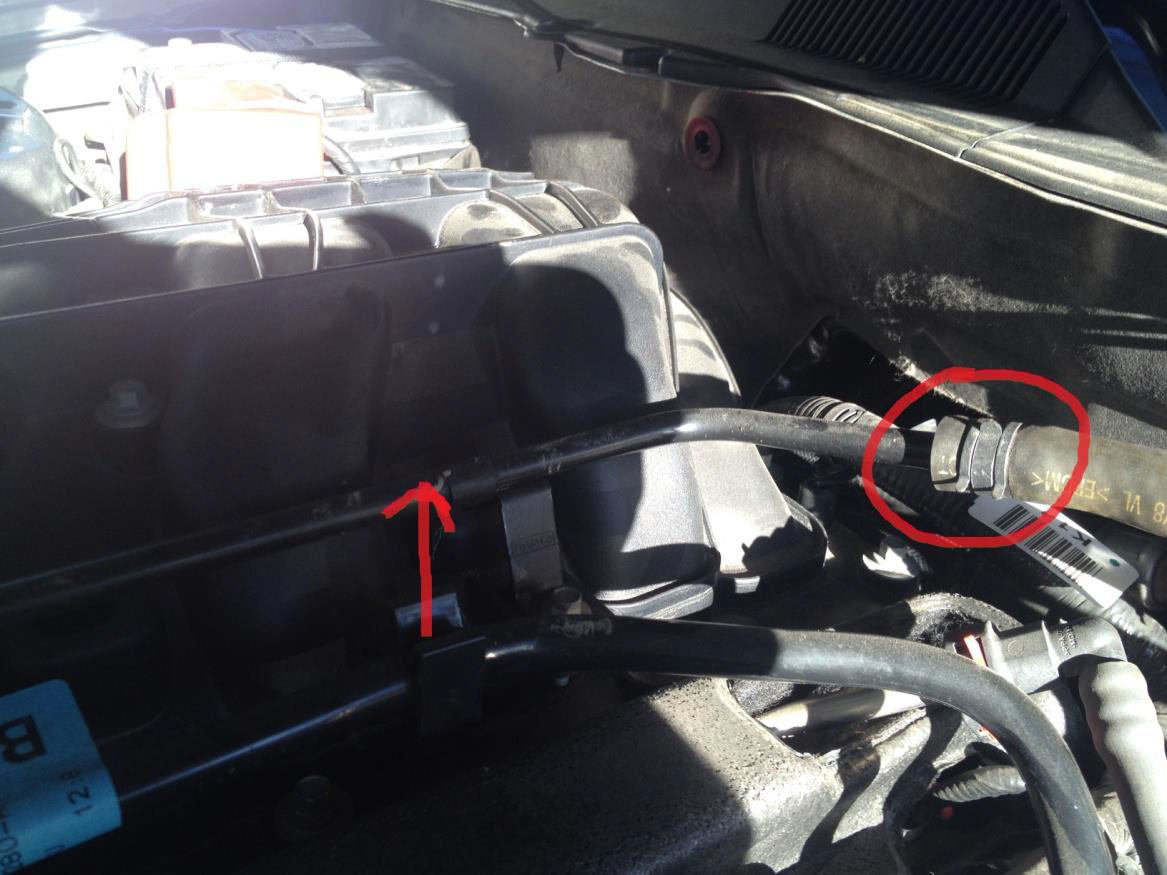
11. Push and pull out the EGR Connector and pullout the pin type electrical harness holder. Now remove the Quick Disconnect EGR Hose Note: If you break this fragile quick disconnect just use a zip tie to keep it in place after (I already have had too!)
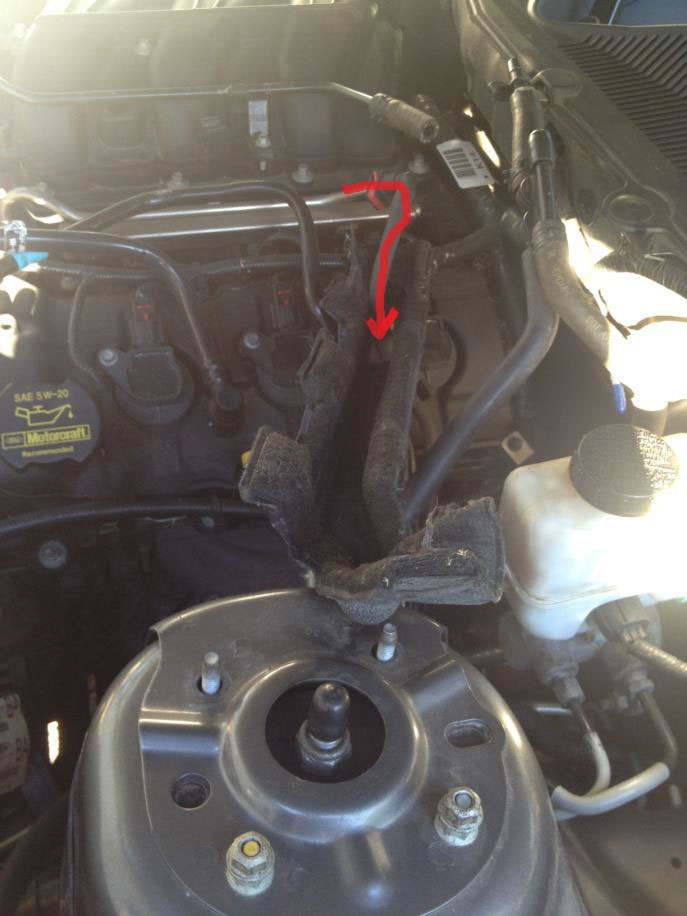
12. Move the Injector Insolating Foam out of the way an up the fuel line… It’s quite Dusty!
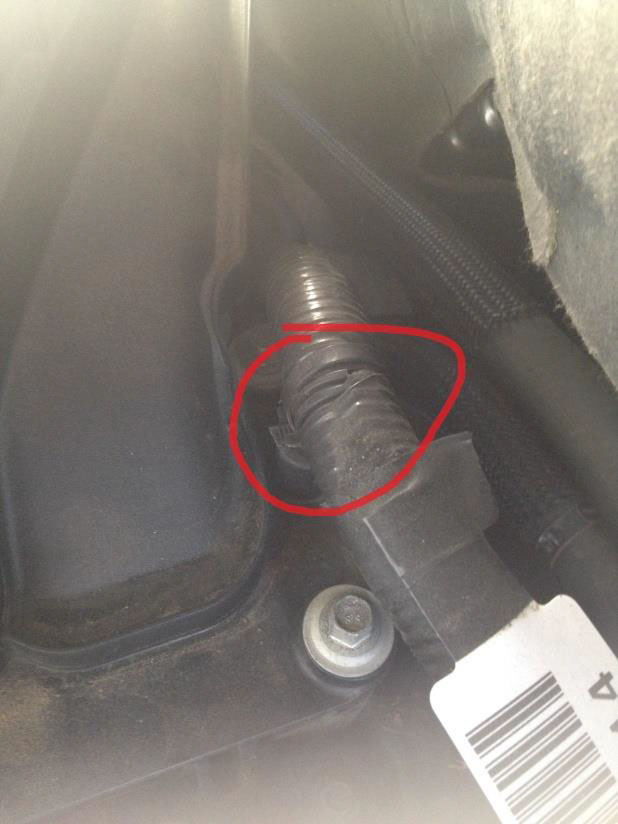
13. Remove the pin type harness holder located near back of the Intake Manifold.
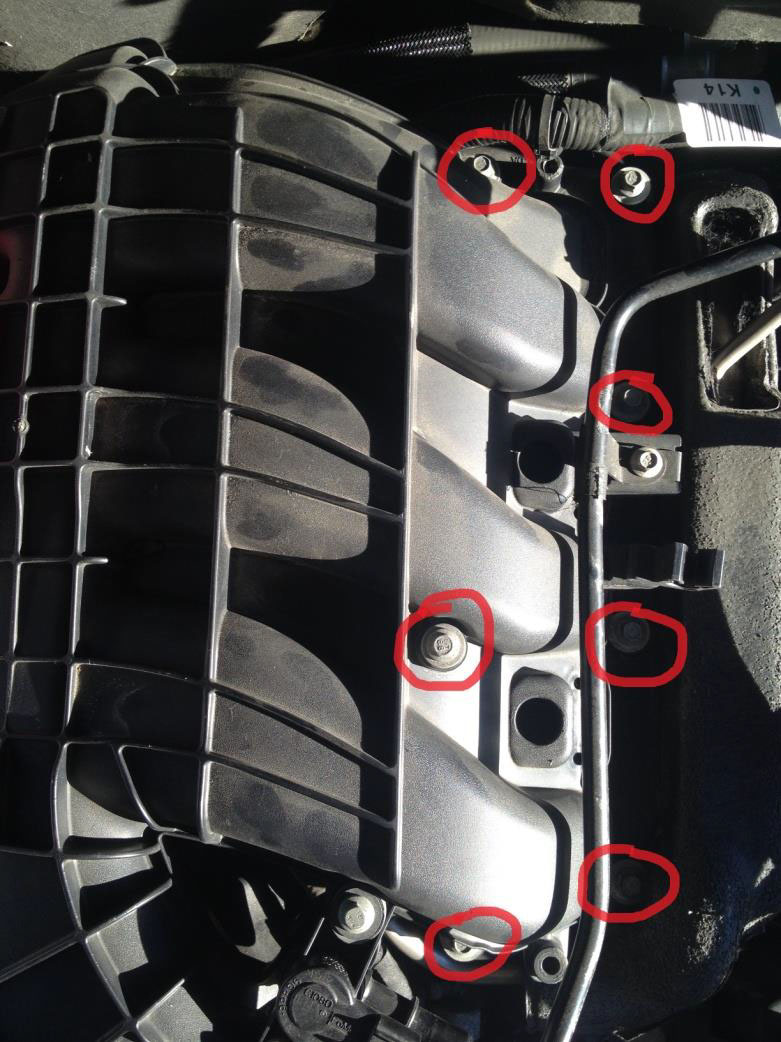
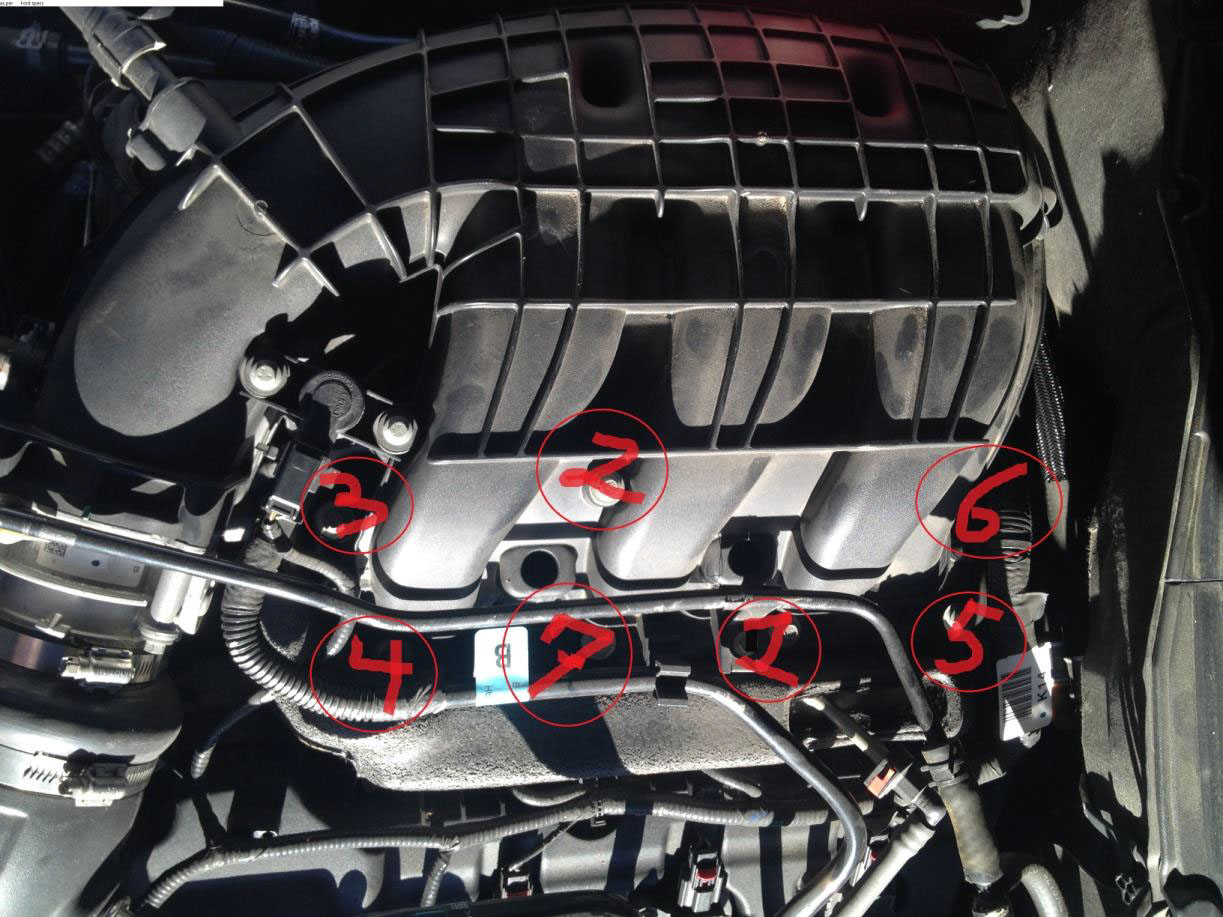
14. Remove the (7) bolts holding down the upper intake manifold using an 8mm socket
15. Clean any oil from mating surfaces on upper and lower intake.
16. Line up the New Gasket on the Lower Intake. Notice the angle in front (it only goes on one way).
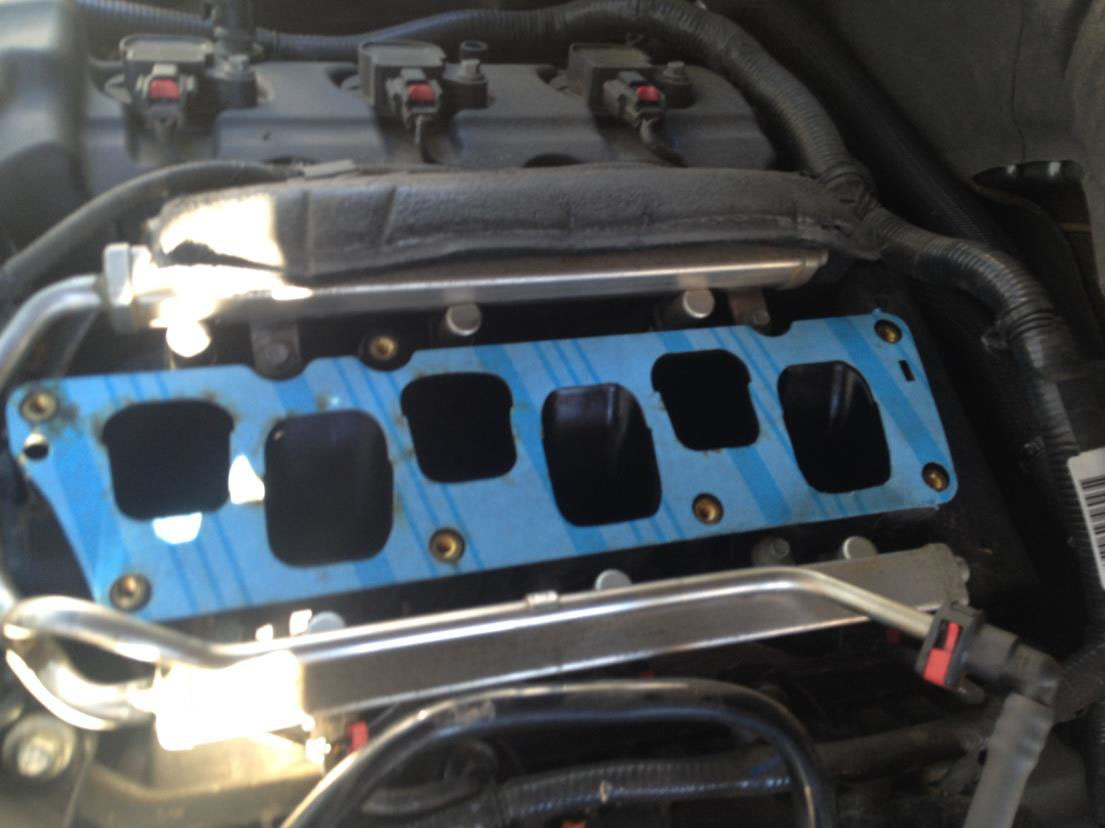
17. Place the spacer on top of gasket in the correct orientation and align with gasket.
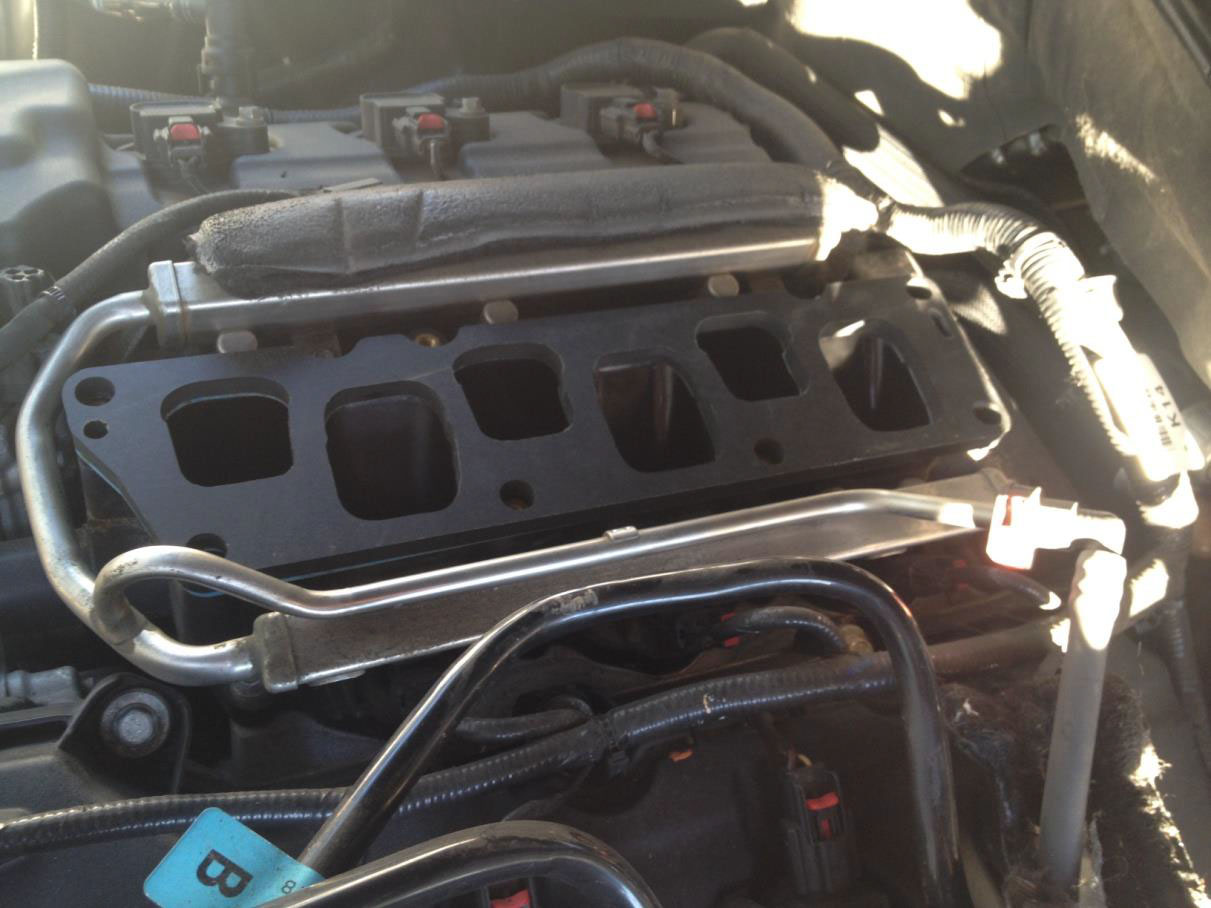
18. Carefully place Upper Intake on top of the spacer… try not to move the spacer.
19. Do not tighten but start the (7) 8mm Intake bolts as they are hard to get on due to the shorten length. Note: It might help to have a buddy hold down the intake to get the bolts started.
20. Using an ‘INCH Pound’ (not foot pounds) torque wrench, tighten the bolts to 89 Ib-in. ( 10Nm ) in the following sequence as shown. Do Not Torque more than 89 Ib-in.
21. Re-install is the reverse of removal. Note: The Upper Intake Support brace will not fit due to increased height. It is likley possible to cut larger holes on the brace to make it fit. I just left the bolts in place like below:
2. After everything is back together start up the car. If you hear any leaks or the engine is running rough you may have a vacuum leak.
Installation Instructions Written by AmericanMuscle Customer Andrew Ludwig 08/02/2016